Previously, the Google OAuth integration used a PKCE-only flow (no client
secret). This switches to a standard authorization code flow where the user
provides both a Client ID and Client Secret from a "Web application" type
OAuth client in Google Cloud Console. PKCE is retained alongside the secret
for defense in depth.
Key changes:
- oauth-client.ts: discoverConfiguration() and createStaticConfiguration()
now accept an optional clientSecret param. When provided, uses
ClientSecretPost instead of None() for client authentication.
- oauth-handler.ts: connectProvider() takes a credentials object
({clientId, clientSecret}) instead of a bare clientId. Removed eager
persistence of clientId before flow completion — credentials are now
only saved after successful token exchange. Renamed resolveClientId to
resolveClientCredentials to return both values from a single repo read.
- google-client-factory.ts: same resolveClientId → resolveCredentials
rename. Passes clientSecret to OAuth2Client constructor and
discoverConfiguration for token refresh.
- repo.ts: added clientSecret to ProviderConnectionSchema. Not exposed
to renderer via ClientFacingConfigSchema (stays main-process only).
- IPC: added clientSecret to oauth:connect request schema. Handler builds
a credentials object and passes it through.
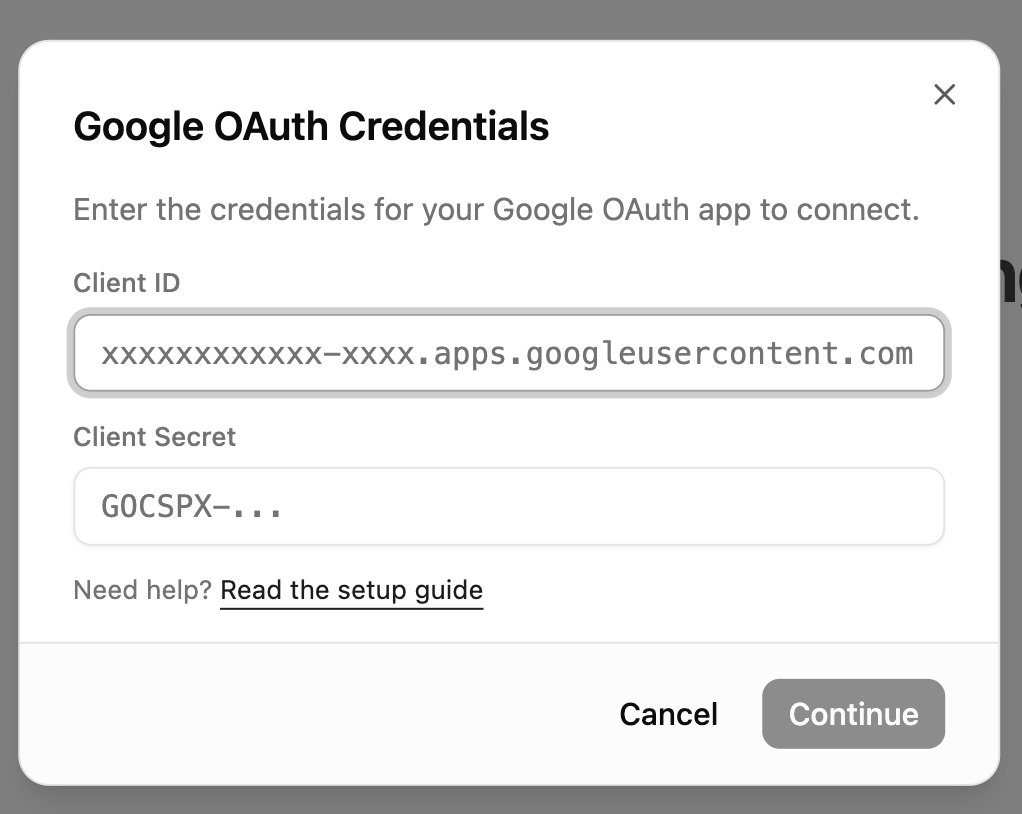
- UI: GoogleClientIdModal now collects both Client ID and Client Secret
(password field). Always shown on connect — no in-memory credential
caching. Renamed google-client-id-store to google-credentials-store
with a unified {clientId, clientSecret} object.
- google-setup.md: updated to instruct users to create a "Web application"
type OAuth client (instead of UWP), add the localhost redirect URI, and
copy both Client ID and Client Secret. Added credentials modal screenshot.
Co-Authored-By: Claude Opus 4.6 (1M context) <noreply@anthropic.com>
3.9 KiB
Connecting Google to Rowboat
Rowboat requires Google OAuth credentials (Client ID and Client Secret) to connect to Gmail, Calendar, and Drive. Follow the steps below to generate them.
1️⃣ Open Google Cloud Console
Go to:
https://console.cloud.google.com/
Make sure you're logged into the Google account you want to use.
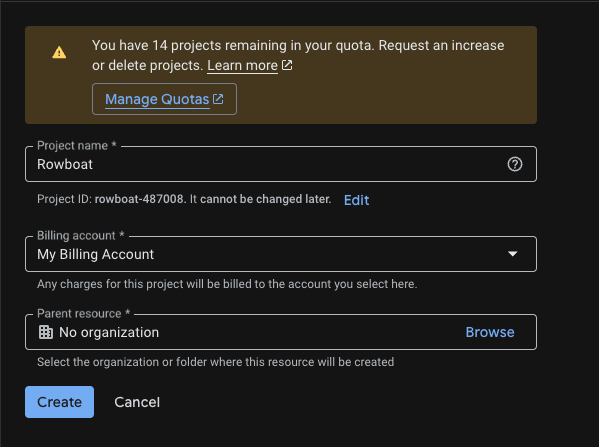
2️⃣ Create a New Project
Go to:
https://console.cloud.google.com/projectcreate
- Click Create Project
- Give it a name (e.g.
Rowboat Integration) - Click Create
Once created, make sure the new project is selected in the top project dropdown.
3️⃣ Enable Required APIs
Enable the following APIs for your project:
-
Gmail API
https://console.cloud.google.com/apis/api/gmail.googleapis.com
-
Google Calendar API
https://console.cloud.google.com/apis/api/calendar-json.googleapis.com
-
Google Drive API
https://console.cloud.google.com/apis/api/drive.googleapis.com
For each API:
-
Click Enable

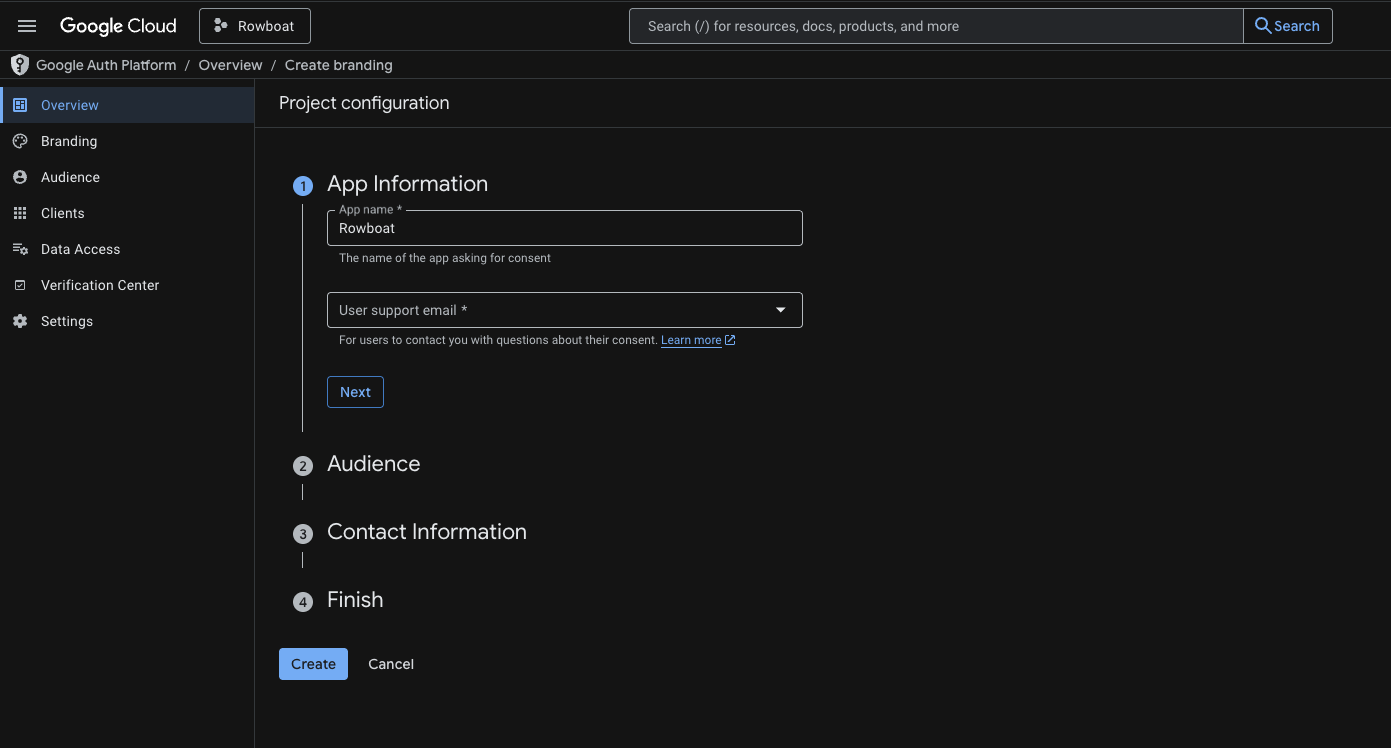
4️⃣ Configure OAuth Consent Screen
Go to:
https://console.cloud.google.com/auth/branding
App Information
- App name: (e.g.
Rowboat) - User support email: Your email
Audience
- Choose External
Contact Information
- Add your email address
Click Save and Continue through the remaining steps.
You do NOT need to publish the app — keeping it in Testing mode is fine.
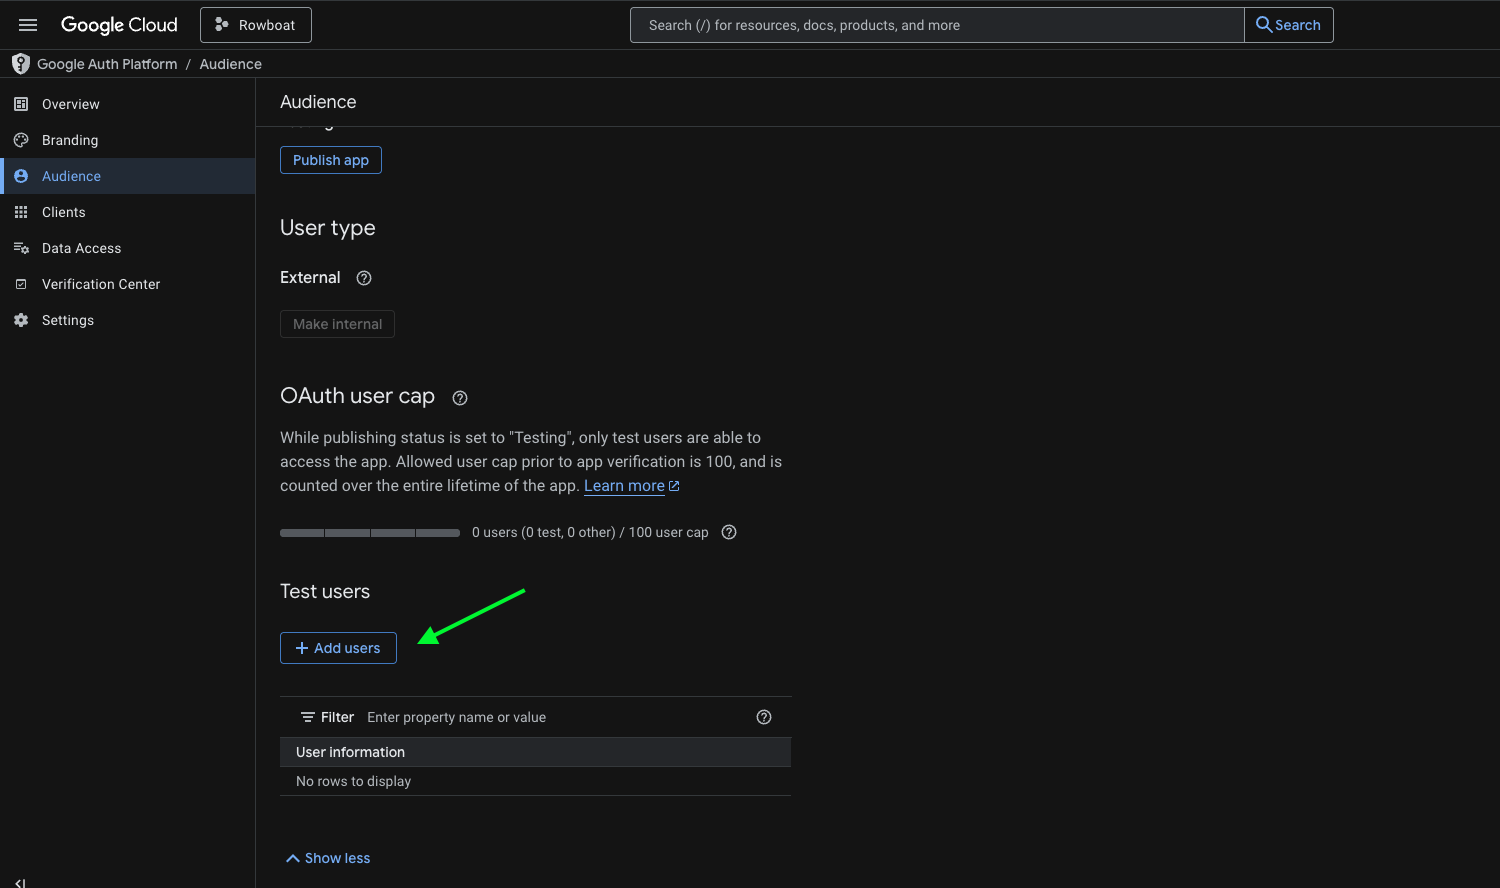
5️⃣ Add Test Users
If your app is in Testing mode, you must add users manually.
Go to:
https://console.cloud.google.com/auth/audience
Under Test Users:
- Click Add Users
- Add the email address you plan to connect with Rowboat
Save changes.
6️⃣ Create OAuth Client ID
Go to:
https://console.cloud.google.com/auth/clients
Click Create Credentials → OAuth Client ID
Application Type
Select:
Web application
- Name it anything (e.g.
Rowboat Desktop)
Authorized redirect URIs
Add the following redirect URI:
http://localhost:8080/oauth/callback
Use this exactly: no trailing slash, port 8080. This must match what the app uses for the OAuth callback.
Click Create.
7️⃣ Copy the Client ID and Client Secret
After creation, Google will show:
- Client ID
- Client Secret
Copy both values and paste them into Rowboat when prompted.
Troubleshooting
Error after "Authorization Successful"
If the browser shows "Authorization Successful" but the app then shows an error (e.g. "invalid response encountered" or "response parameter "iss" (issuer) missing"):
- Check the app logs (e.g. terminal or dev tools) for the full error. The message there will often indicate the cause (e.g. redirect URI mismatch, missing parameter).
- Verify redirect URI in Google Cloud Console: Open Credentials → your OAuth 2.0 Client ID. Ensure
http://localhost:8080/oauth/callbackis listed under Authorized redirect URIs. - Client type: Make sure you selected Web application as the application type. Other types (Desktop, UWP) may not provide a client secret or may handle redirect URIs differently.