mirror of
https://github.com/rowboatlabs/rowboat.git
synced 2026-04-25 08:26:22 +02:00
138 lines
3 KiB
Markdown
138 lines
3 KiB
Markdown
# Connecting Google to Rowboat
|
||
|
||
Rowboat requires a Google OAuth Client ID to connect to Gmail, Calendar, and Drive. Follow the steps below to generate your Client ID correctly.
|
||
|
||
---
|
||
|
||
## 1️⃣ Open Google Cloud Console
|
||
|
||
Go to:
|
||
|
||
https://console.cloud.google.com/
|
||
|
||
Make sure you're logged into the Google account you want to use.
|
||
|
||
---
|
||
|
||
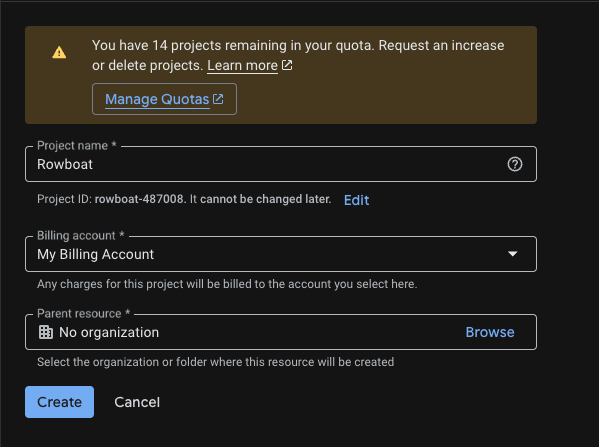
## 2️⃣ Create a New Project
|
||
|
||
Go to:
|
||
|
||
https://console.cloud.google.com/projectcreate
|
||
|
||
- Click **Create Project**
|
||
- Give it a name (e.g. `Rowboat Integration`)
|
||
- Click **Create**
|
||
|
||
Once created, make sure the new project is selected in the top project dropdown.
|
||
|
||
|
||
|
||
---
|
||
|
||
## 3️⃣ Enable Required APIs
|
||
|
||
Enable the following APIs for your project:
|
||
|
||
- Gmail API
|
||
|
||
https://console.cloud.google.com/apis/api/gmail.googleapis.com
|
||
|
||
- Google Calendar API
|
||
|
||
https://console.cloud.google.com/apis/api/calendar-json.googleapis.com
|
||
|
||
- Google Drive API
|
||
|
||
https://console.cloud.google.com/apis/api/drive.googleapis.com
|
||
|
||
|
||
For each API:
|
||
|
||
- Click **Enable**
|
||
|
||

|
||
|
||
|
||
---
|
||
|
||
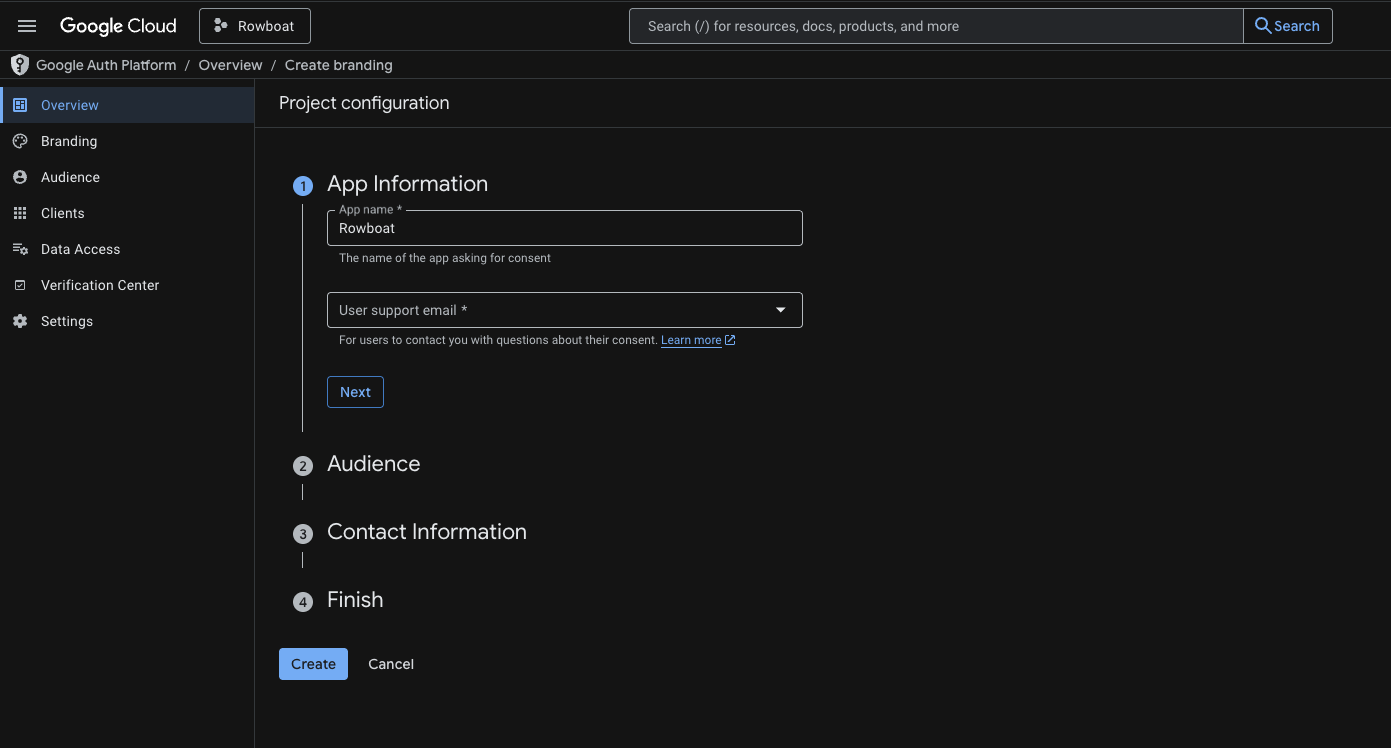
## 4️⃣ Configure OAuth Consent Screen
|
||
|
||
Go to:
|
||
|
||
https://console.cloud.google.com/auth/branding
|
||
|
||
### App Information
|
||
|
||
- App name: (e.g. `Rowboat`)
|
||
- User support email: Your email
|
||
|
||
### Audience
|
||
|
||
- Choose **External**
|
||
|
||
### Contact Information
|
||
|
||
- Add your email address
|
||
|
||
Click **Save and Continue** through the remaining steps.
|
||
|
||
You do NOT need to publish the app — keeping it in **Testing** mode is fine.
|
||
|
||
|
||
|
||
---
|
||
|
||
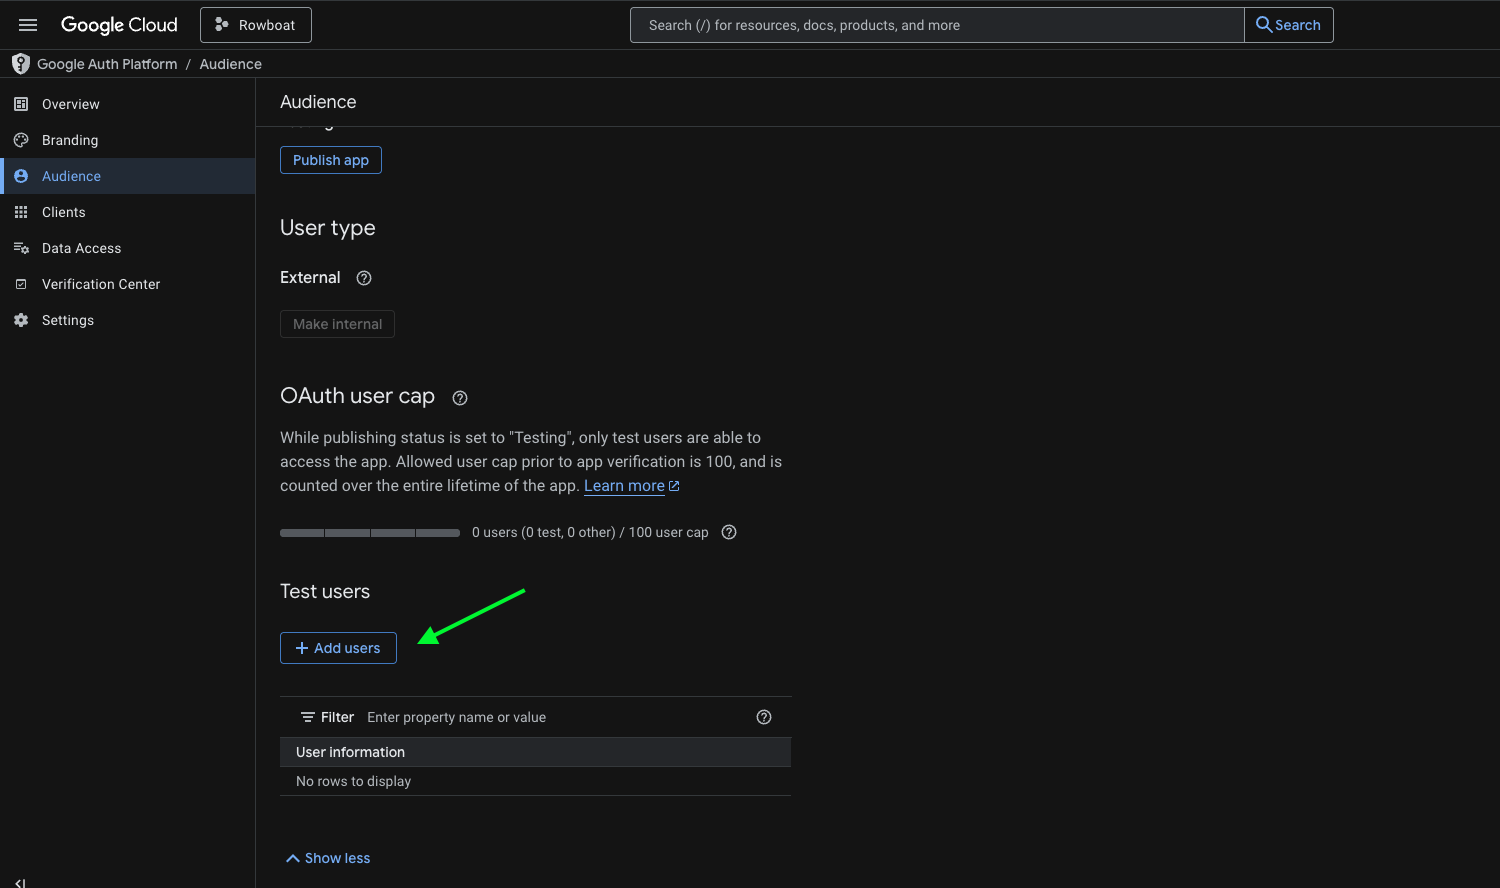
## 5️⃣ Add Test Users
|
||
|
||
If your app is in Testing mode, you must add users manually.
|
||
|
||
Go to:
|
||
|
||
https://console.cloud.google.com/auth/audience
|
||
|
||
Under **Test Users**:
|
||
|
||
- Click **Add Users**
|
||
- Add the email address you plan to connect with Rowboat
|
||
|
||
Save changes.
|
||
|
||
|
||
|
||
---
|
||
|
||
## 6️⃣ Create OAuth Client ID
|
||
|
||
Go to:
|
||
|
||
https://console.cloud.google.com/auth/clients
|
||
|
||
Click **Create Credentials → OAuth Client ID**
|
||
|
||
### Application Type
|
||
|
||
Select:
|
||
|
||
**Universal Windows Platform (UWP)**
|
||
|
||
- Name it anything (e.g. `Rowboat Desktop`)
|
||
- Store ID can be anything (e.g. `test` )
|
||
- Click **Create**
|
||
|
||

|
||
|
||
---
|
||
|
||
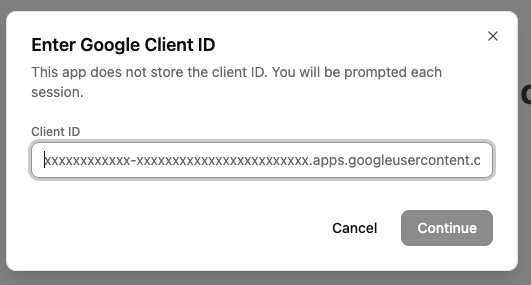
## 7️⃣ Copy the Client ID
|
||
|
||
After creation, Google will show:
|
||
|
||
- **Client ID**
|
||
- **Client Secret**
|
||
|
||
Copy the **Client ID** and paste it into Rowboat where prompted.
|
||
|
||
|
||
|
||
---
|